DIY Letter Art (Pottery Barn Dupe)
- Jennifer Laura
- Jan 11, 2021
- 3 min read
Updated: Sep 25, 2023
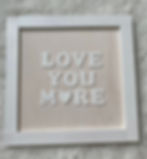
This post starts out very similarly to a lot of my posts...I saw something I really liked... ie. this art from Pottery Barn Kids, but didn't want to spend the money and thought I might be able to make it myself...

so I did! For less than a fourth of the cost too! My original inspiration wasn't crazy expensive for what it was and I definitely think it would have been worth it, but everything for Lincoln's room makeover was adding up quickly and I was willing to cut corners wherever I could! If you're in the market for something similar this DIY could be easily adjusted/customized to say anything, in any color, and any size. So truly the possibilities are endless with this one! I'm not usually a fan of "word art" but I think for a kid's room it totally works and as long as you don't choose the words 'live, laugh, love' you're good. So let's get into the tutorial!

Supplies:
- (4) 1/2" x 2' x 2' boards
- (1) 2' x 2' piece of plywood
- (8) short screws
- paint in whatever color you want! I used a leftover tester pot of white paint
The first thing I did was plan out the size of the art on my wall. I knew the faux taxidermy I was making was going to go above it so I marked that out as well. And I decided that a 16" x 16" size would be perfect.

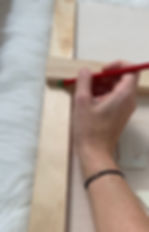
Then I laid out my boards, plywood, and letters to make sure I was happy with the size.

I thought this looked good, so I went ahead and marked all my cuts.

I could have used my miter box to miter the edges of the frame, but I thought laying them out straight would be a cute detail. So each trim piece was cut to 14.5" to allow for the 1.5" width of the next board.

Kris and I used a jigsaw to cut everything which certainly isn't ideal, but it's what we're currently working with. I'm adding table saw, miter saw, and power sander to my birthday wish list.

Once all of my pieces were cut to size I went ahead and gave everything a coat of paint- I decided to paint the trim and letters solid white and do a white stain on the back piece for a light subtle contrast.

To make my white "stain" I just put some paint in a cup and mixed it with about 2 cups of water. I didn't measure, but the ratio was probably about 1 parts paint, 2 parts water.

I brushed it onto my plywood pretty heavily and then wiped it off with a paper towel.


Once everything had dried I screwed the trim boards onto the edge of my plywood. I used short screws to make sure they didn't poke through the front.

Then all that was left was to glue my letters onto the board and frame which I did with the maximum strength wood glue.

I also nailed in a small gold hanger onto the back so I could attach it to the wall.

Super easy project and my total for all the supplies was around $20, so I'm glad I decided to go for it instead of buying the Pottery Barn piece (which would have ended up being too large for the space anyway).


Want to see more of Lincoln's Room Makeover?


