

How to Lay Luxury Vinyl Tile from DuraDecor
- Jennifer Laura
- Sep 24, 2021
- 4 min read
Updated: Sep 4, 2023
This post is sponsored by DuraDecor.
Laying the flooring in my niece Harley's room turned out to be much easier than I expected... and I expected it to be pretty easy.

I'm going to take you through the entire process of installing luxury vinyl tile from DuraDecor, it's the perfect solution to freshen up a space quickly and easily!
Before you start:
Calculate how much flooring you will need.
Calculate the square footage of your room and make sure to add 10% to this total to account for waste.
Collect your supplies.
- DuraDecor luxury vinyl tile, I used their roughcut lumber sienna color (it was so pretty!)
- sharp utility knife
- straight edge (optional, but I found it helpful)
- tape measure (or laser level)
- pencil
- 100 lb 3 section roller
Additional supplies for finishing details:
- threshold (we used this tile to vinyl threshold at the entrance of her room, but what you need will depend on what material you are butting your vinyl up to)
- quarter round (we opted to add quarter round around the edge of the room for a nice clean look)
- nail gun to attach quarter round
- caulk
Prepare your subfloor.
The first thing we did was make sure we had a perfectly clean subfloor surface to start with. For us, that meant carpet, carpet pad, and tack strip removal.


I used a scraper to make sure we got all of the adhesive up from the carpet pad while Kris tackled removing the tack strips.

Once we had everything out, we swept, and vacuumed, and then vacuumed again. We wanted to make sure we got every last bit of dust and debris!

Time to install!
Once we had our clean surface it was time to start laying the vinyl! First, we decided how we wanted to orient them- horizontal or vertical? I decided to run them vertically so they lined up with the existing flooring in the hallway.
At this point it's very tempting to start at the edge of the room and lay the floor using the wall as a straight edge, but DON'T DO THAT! It's possible (and even likely) that the room does not have perfectly straight walls, which could mean you end up with crooked floors if you start at the wall. What you want to do is find the center of your floor. A laser level would have come in super handy here, but we didn't have one, so we measured to the length and width of the room to find the center point and then drew a straight line all the way down the middle of the room. You could use a chalk line to mark this, too.


Once we had our center line, it was time to start laying the DuraDecor peel and stick vinyl planks. We started laying them along our center line.


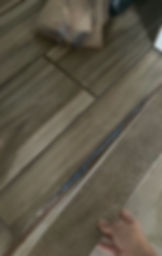
Kris laid an entire row and kept each piece completely snug to the last plank. When we got to the last plank on that row, we needed to trim it to fit, which couldn't have been easier. Kris scored the tile with our utility knife and a straight edge and then bent and snapped it.


The first few times we did this we were trying to cut through the vinyl, but that is not necessary at all. Truly, the thinest score will work and the piece will snap and leave you with a perfectly straight line!

We did decide to use the snapped side along the edge of wall (that will later get covered with quarter round) just for an ultra-clean result. We left a 1/32" gap around the entire perimeter of the room to allow for expansion, since vinyl expands slightly in warmer temperatures and contracts in colder temps. Each time we trimmed a plank at the end of the row, we started the next row with the remainder of the plank, which left us with a perfect staggered look for our planks.

After placing each section, we used a 3-section roller and some Kris-muscle to roll each section into place. This helped the pressure sensitive adhesive to really bond to our subfloor. The trickiest part of this project was cutting around the doorway in the closets.

There were quite a few intricate cuts to be made that wouldn't be covered by shoe molding, this is the part that I focused on. I made sure to cut as neatly as I could and if it wasn't perfect, I started over. This is where it came in handy to have ordered a bit extra. When installing flooring, always be sure to calculate 10% more for waste just in case you have some intricate cuts or 'oops' moments.
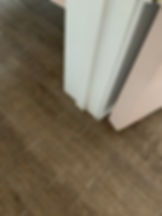
Once we finished laying all of the flooring, Kris went back in and added the shoe molding and the threshold at the doorway (the one you need may vary depending on what type of flooring you are transitioning to). I couldn't be happier with the final product- it's beautiful!


Harley’s mom even raved about it and now wants to lay the exact flooring in her son’s room (hmm…next flash makeover?) Let me know if you have any questions and I'm curious to know... would you install luxury vinyl peel and stick tile in your home?
Disclaimer: This post is sponsored by DuraDecor. All opinions, words, and images are my own.
Need to catch up on Harley's room makeover?
