

Quick Breakfast Nook Chair Refresh #StyleItNow
- Jennifer Laura

- Jan 27, 2021
- 4 min read
Everyone loved the #StyleItNow challenge so much I decided to bring it back! If you're unfamiliar with the challenge, here's the premise! Pick a neglected corner of your home and using only what you already have you're going to... #StyleItNow. I challenge you to get creative and improve your home in some way while spending $0. Tag me on instagram so I can see it and make sure to use the hashtag #StyleItNow. I can't wait to see what you come up with!
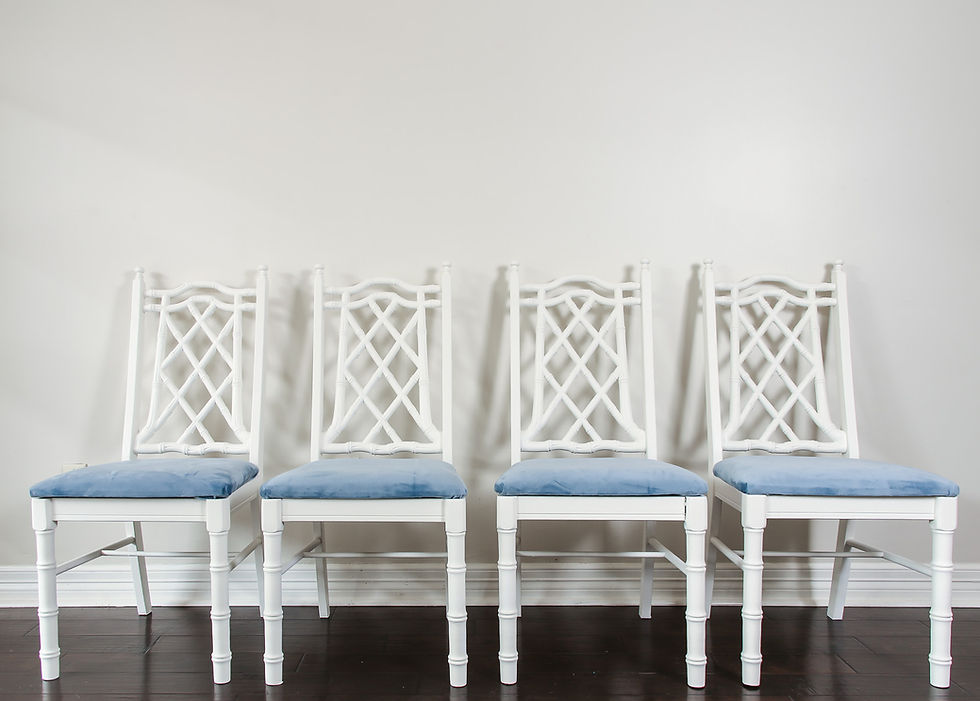
This week I decided I wanted to do something for the kitchen makeover, but I'm still waiting for a lot of my materials to come in (or I need to find them on FB marketplace-ha!)... pretty much the only thing I already have are the breakfast nook chairs (remember I used one of them in the last #StyleItNow challenge). I found these at an antique store when we were visiting Kris' family over the holidays and I was able to snag all four for $175.

The frames are stunning, but the finish was in bad shape so last week I sanded them down and gave them a coat of primer with Zinsser 123.

Then Kris helped me paint them with Behr's Swiss Coffee. It's a really pretty creamy white color.

All that was left to do was reupholster these cuties. I wasn't sure what fabric I wanted to use and figured I would order some swatches (maybe Crypton?), but after we finished up the curtains for our bedroom last week I ended up having two entire panels that I didn't need (I had originally ordered six pairs of these panels from Amazon and only ended up needing five).

I could have returned them but I started to realize that the fabric might be exactly what I had in mind for the kitchen. I held it up to the paint swatches I was considering and it looked amazing!

It wasn't the spill resistant Crypton that I had in mind...these are breakfast chairs after all. But this fabric was here...and it was free (well...I had already paid for it). So in the spirit of #StyleItNow, I went for it! I think I will end up spraying them with some Scotchgard to help protect them and if we have a really stubborn spot I could always reupholster them with more of the leftover fabric.

These are the kind of chairs with a removable seat so reupholstering them was a breeze! If you're ever wondering if you can do this type of reupholstery- you absolutely can!! All I needed was my fabric, a staple gun, staples, and some scissors. I started by simply cutting the fabric to size by plopping the old cushion face down and then making sure I left about 6-8" overlap on each side before cutting.


Once my fabric was cut, I simply wrapped it around the chair and stapled it. Starting with the bottom (the part that will be closest to the chair back). I ignored the corners for now, they are the trickiest part and saving them for last helped me achieve a cleaner look.

Next I stapled in the front, starting in the center and working my way out, pulling as hard as I could every time I placed a staple.

Then I did each side, again ignoring the corners.

Now it was time for the corners- I did the back corners first, these are the ones that are going to tuck into the chair back.

Here you can see how I folded my corner to get a clean edge.

This is what it looks like inside the fold, the fabric is coming together and then flattening on itself.

And then here it is after I had stapled it. Now it was time for the front corners which are definitely the most important part! I didn't want multiple creases and folds to be visible from the top of the seat cushion so here's what I did.

First, I cut a slit down the corner, being careful not to go too far (I didn't want the cut visible from the top).

Then stapling around the outer corner very close to the edge making sure I was pulling while stapling so I didn't get any creases (please excuse my dirty floor- I swear I vacuumed yesterday, but this is the life with two kids and two dogs).


Then I tucked the fabric underneath and folded it over to make a neat and tidy corner. This resulted in only one crease visible from the front/top.


All that was left to do was to re-screw the seat cushions back to the chair frames.

The whole process took me under an hour and that was with stopping to take multiple videos and photos. Easy-peasy!
I LOVE how they turned out and they are getting me SO excited to tackle the rest of the kitchen! Now we just need a new breakfast table...
Need to get caught up on the kitchen makeover?
Want to see the first #StyleItNow challenge?
You can check out my mini-desk makeover I tackled right here.


Comments